March to June 2021
Sika is sticky aka endless repair works
From the end of March to the beginning of June we spent our days cycling to Kakumäe Haven. Borrowed my moms car to drive to various specialised construction shops (all in opposite ends of town), watched numerous youtube tutorials and got our hands, face and basically everything else dirty on the boat.
The 136 item long to-do-list featured works like: remake the electricity system, come up with a new topping lift system, remove clue from the interior walls and fight off the rust on the keel and soooo on.

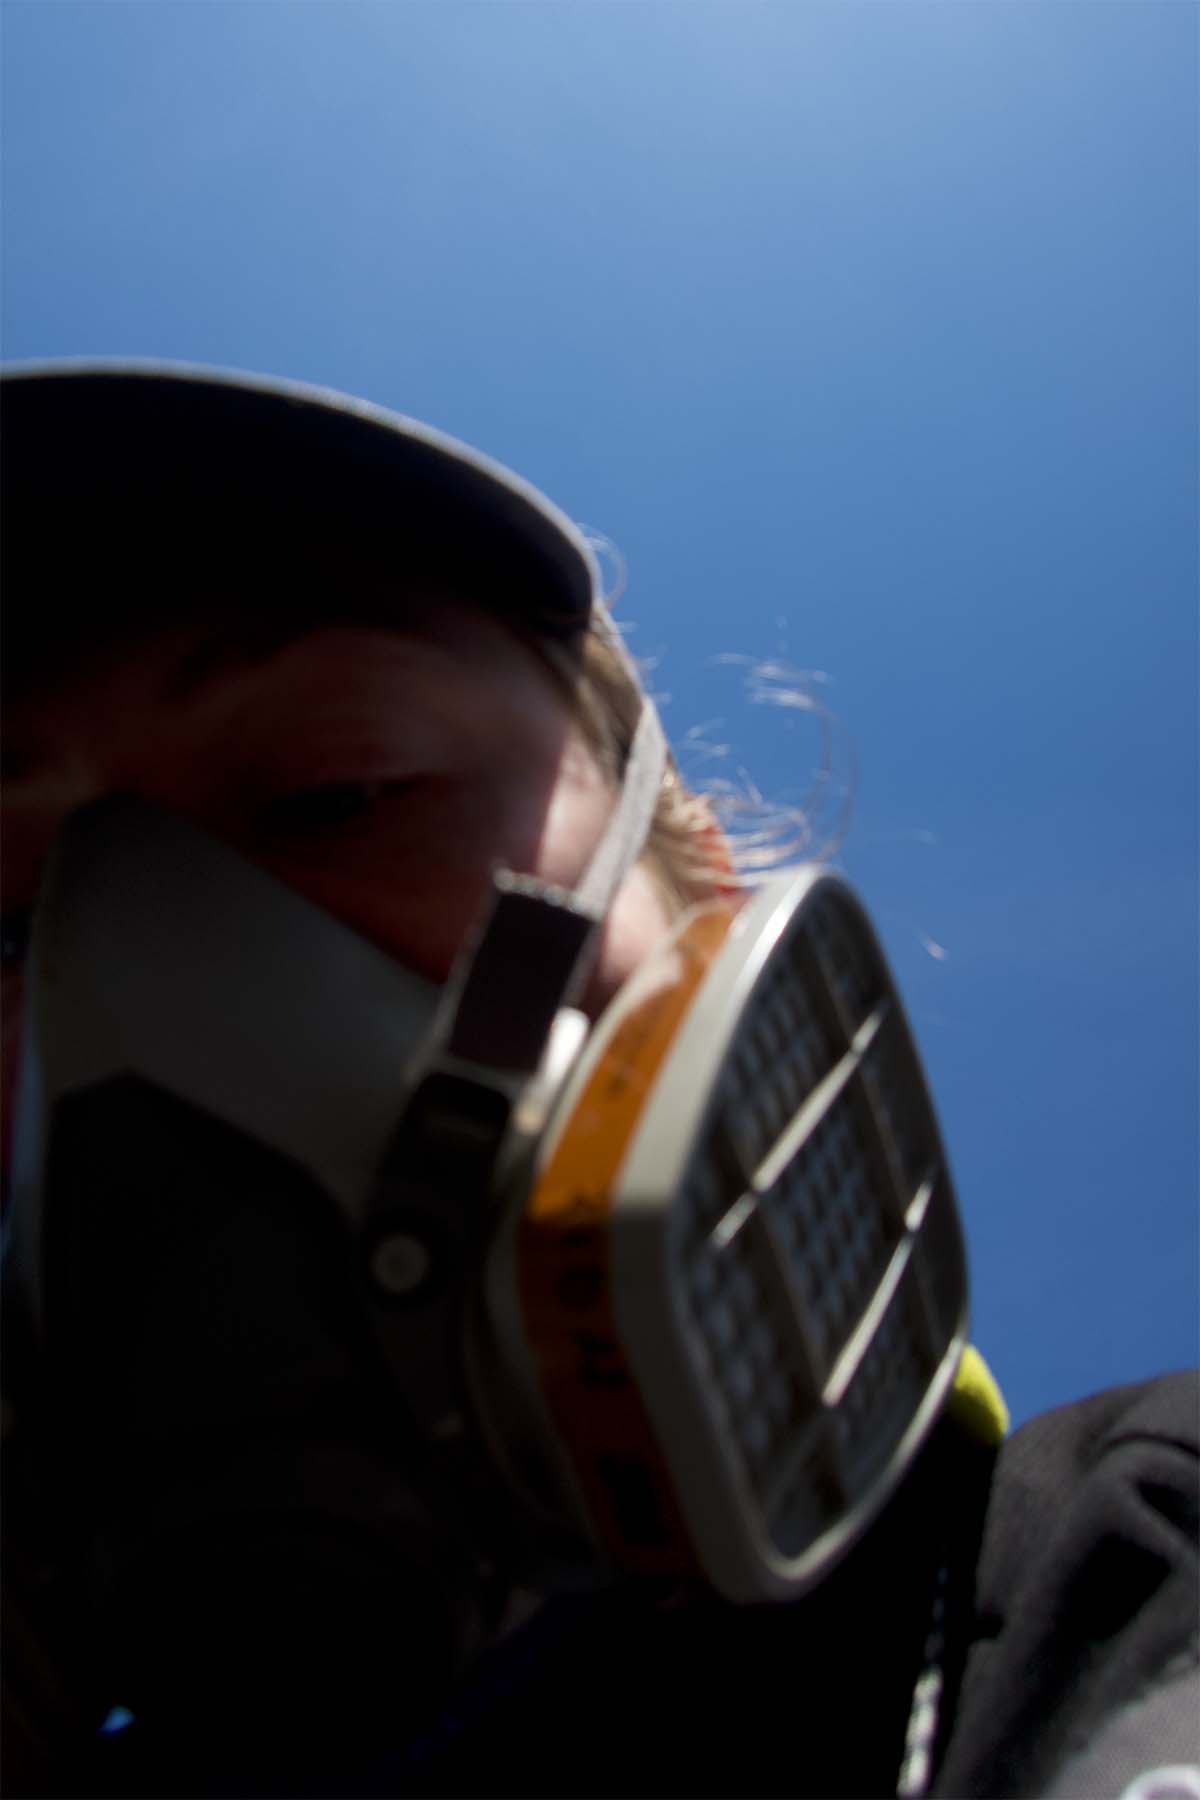
Me slightly grumpy after a week of grinding of glue from walls.
My highlight was repairing the lifeline.
As the name says a very important feature of the boat — a line for life — but for some reason one of the weakest parts of this benetau model and other manufactured around this time. In short a lifeline is the line that runs around the edge of the boat to prevent you from falling into the water (eesti keeles: reeling, in german: …). It has little structural purpose and is irrelevant for sailing quality, but important never the less. One can be quite thankful for it especially at stormy sea or when doing a sail change in the bow of the boat, when trying to pee crouching overboard or giving mental and emotional reassurance for newbies.
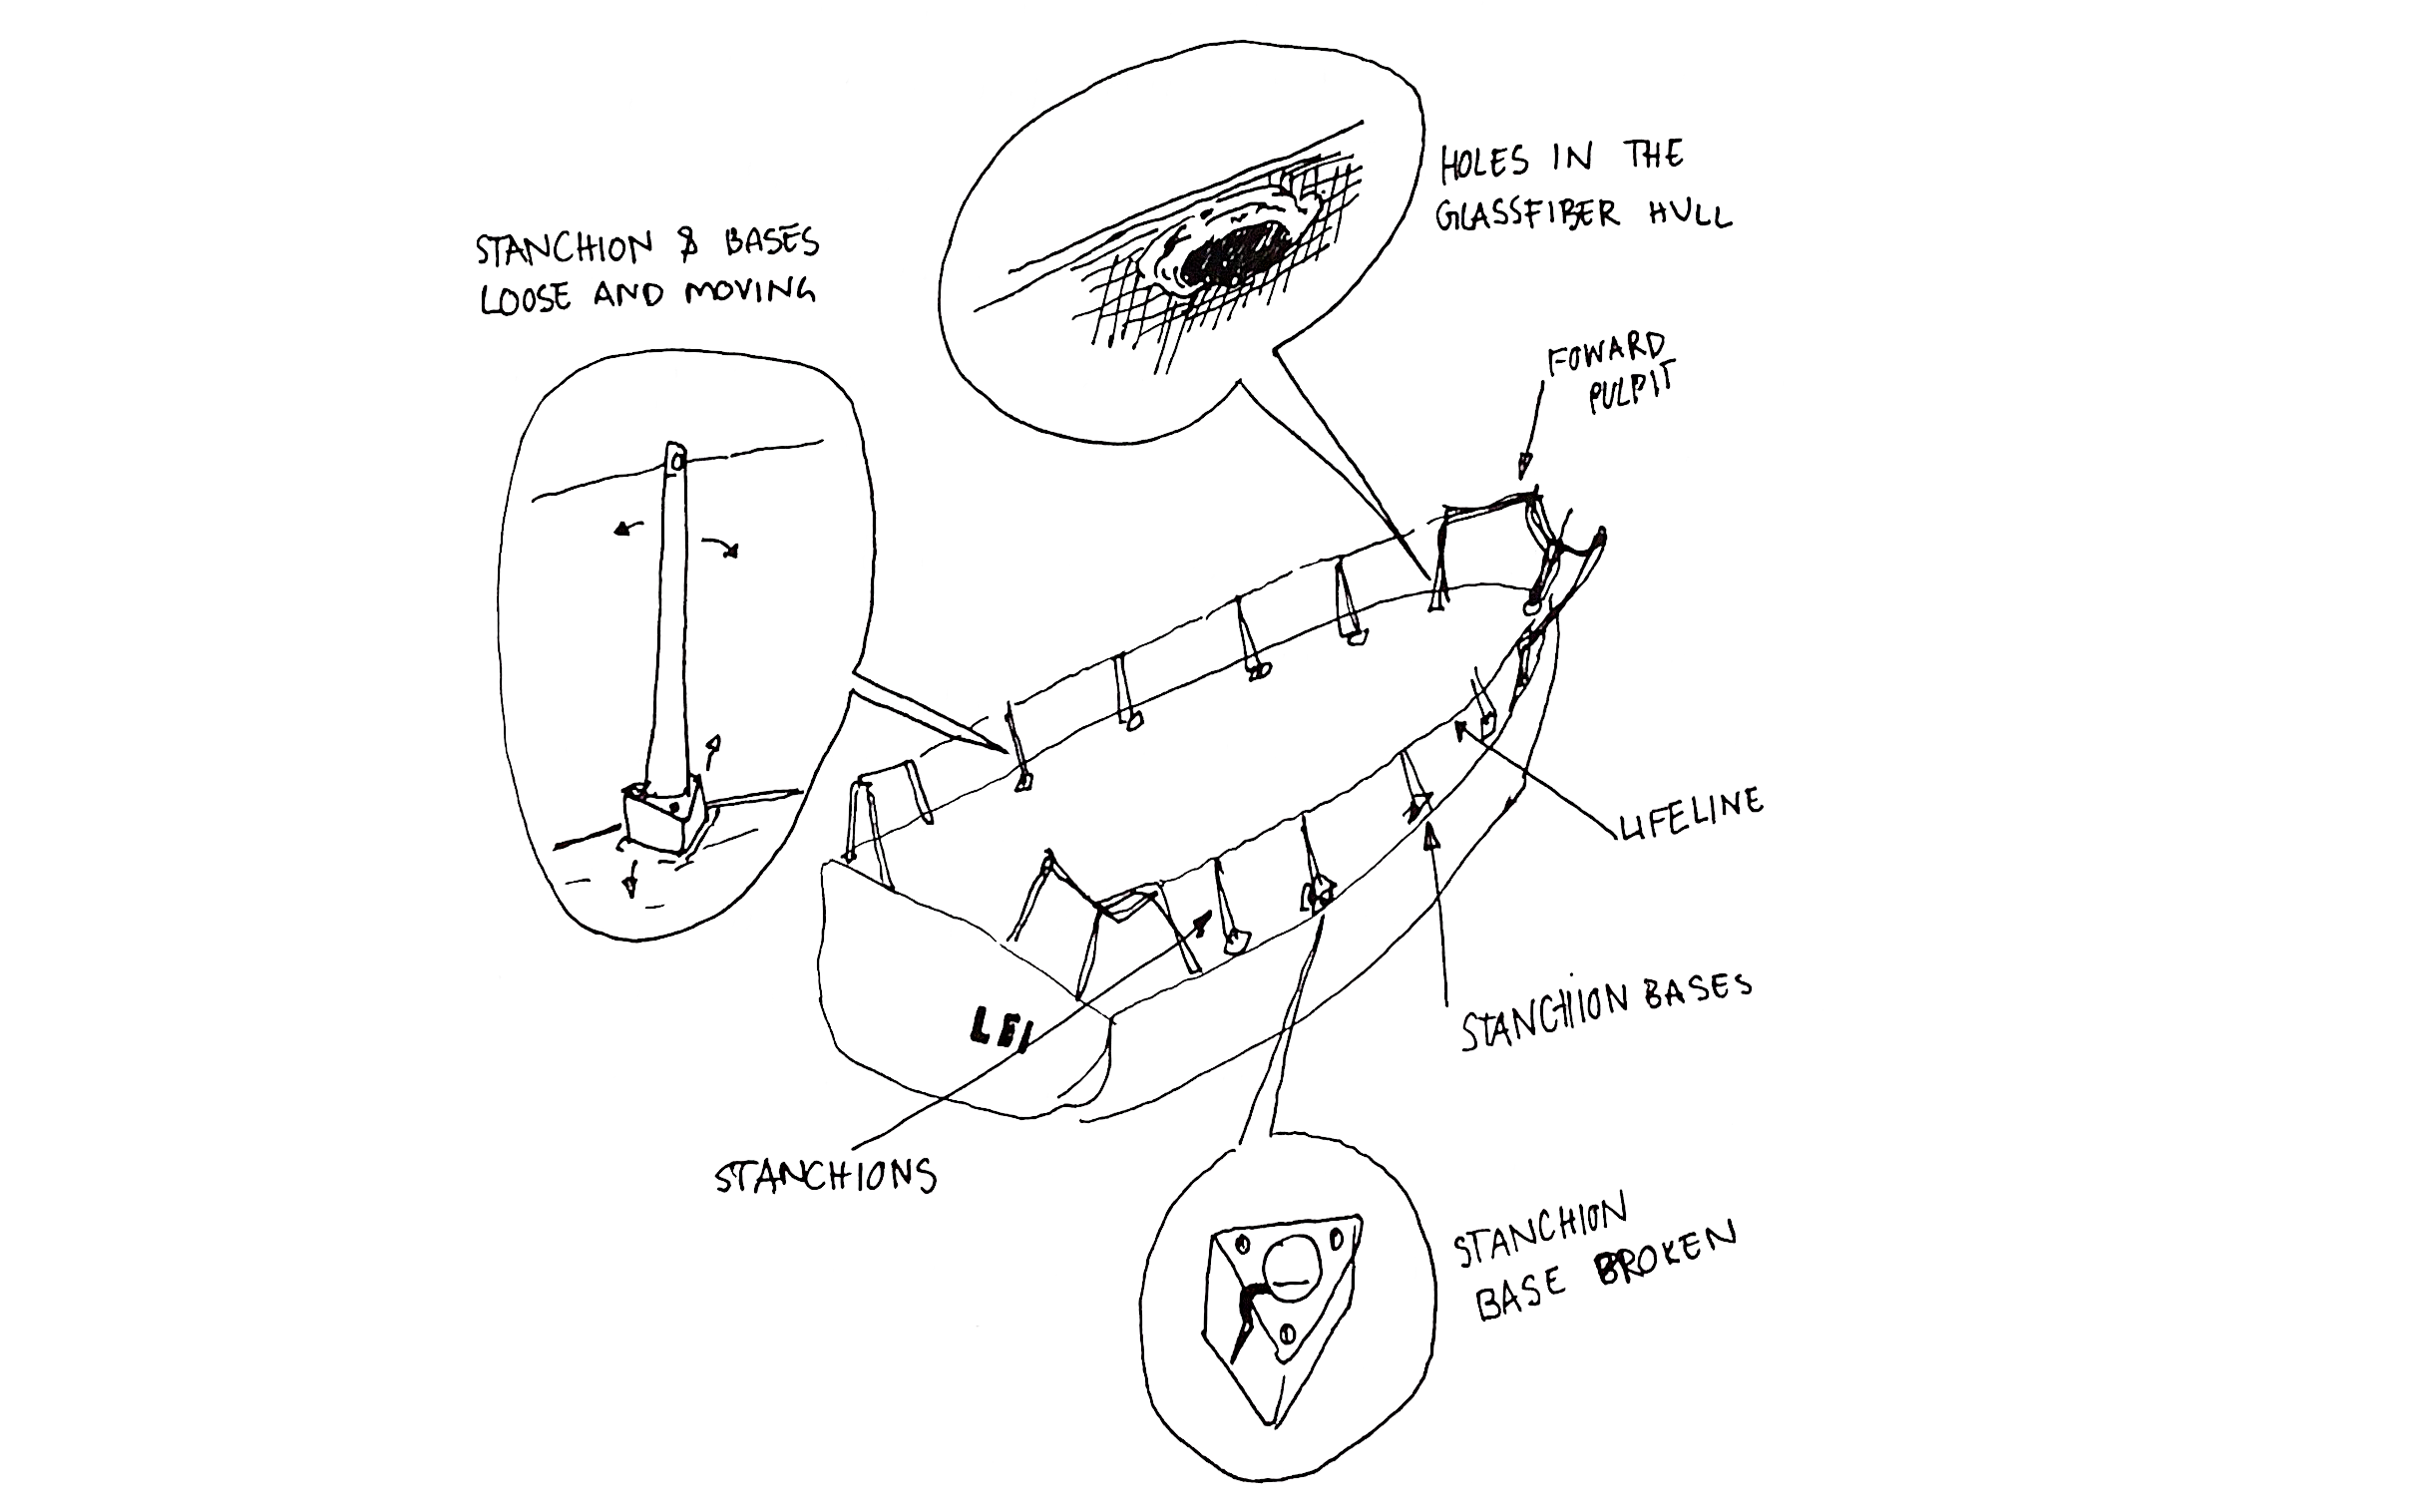
Our lifeline has small triangular plastic pieces screwed into the boat which hold up poles through which the line runs. These stanchion bases were leaking and wobbly and some broken. The biggest issue was the way too shaky forward pulpit (or as i call it front metal piece) which had damaged the hull of the boat.
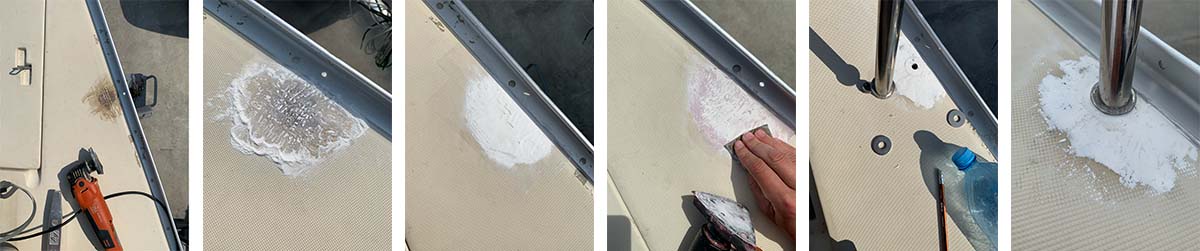
Step one — broken forward pulpit
I sanded away the damaged glass fibre and the rotten wood that was sandwiched between the two layers of plastic for extra stability. Then I filled it with a mad mix of toxins: glass fibre dust 3%, glass fibre pieces 2% and polyester-resin. The recipe was recommended to me by a sweet gut from the local composites shop. It was cured using emergency heat bags from decathlon as the temperature outside was still way lower than the required curing temperature of 16 degrees. Underneath the new repaired spot I put a couple of layers of glass fibre mats infused with resin.

Paul mixing epoxy
Finally sanded the top and put on gel goat and drilled new holes as I had filled the previous ones with the polyester mix. Sounds like a day's job, but took me a some weeks to figure out.
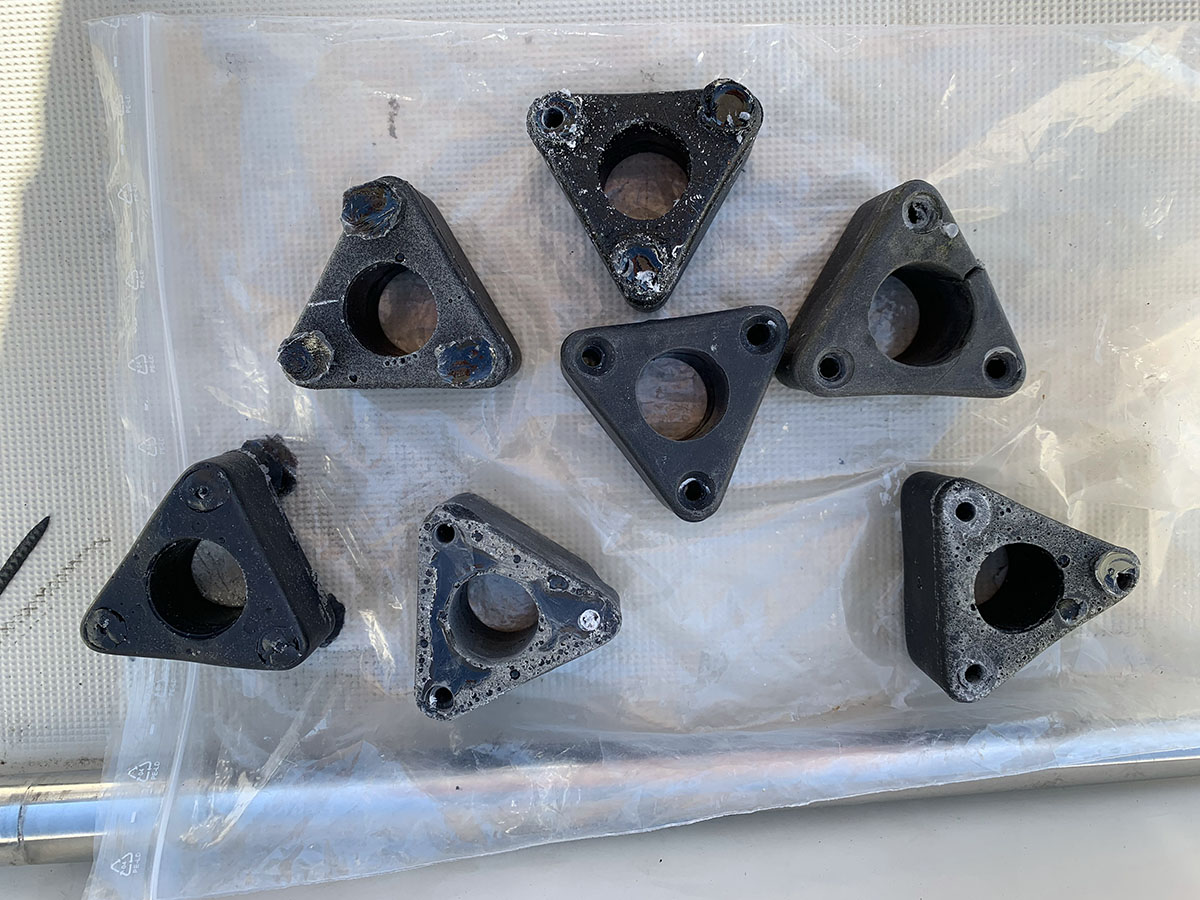
Step two — make new stanchion bases
I made a one part silicone mold from the existing stanchion base. Cut it into half and filled it with: two parts epoxy resin reinforced with carbon dust (5%) and glass fiber (1%). After several trials I learnt some things. 1. to let the process of hardening start before you pour it into the mold to get less bubbles 2. using scales pays off (i use to take pride in eyeballing it) correctly measured makes the mixture stronger.
Try-outs
Step three — attaching the bases to the boat
Drilling holes into the bases turned out to be much more difficult than expected. We were helped out by a kids creativity center in Tallinn (othanks!). They let us overgrown kids use their stationary drill and finally we could attach the bases to the boat! Not so fast. The plastic had shrunk. But paul did his magic grinding them smaller with a broken file attached to the hand drill and we were ready to sika them onto the boat!

We used two sikas and five roles of paper and some extra from the port toilet (thanks kakumäe haven)
Spoiler alert: the screws of the fist base broke on the second day at sea.. so we decided to drill the holes through and attach it with washers and nuts from the bottom. It is still holding (for now).
Written by Mia, pubblished on the 18th of June 2021